Early this year, Amy and I decided to install new floors in our home. The previous floor, although fairly recent (2008), was builder grade carpet, tile, and laminate. Neither of us like carpet very much. Nor do we like smaller tiles because of excessive grout lines. We chose to install a floating laminate hardwood floor.
We received a quote from a local company. Because of this, we decided to tackle this project ourselves (yes, as newlyweds). There were 4 phases to the project.
- Remove the baseboards – Done
- Demo the old floor – Done
- Install the new floor – Done
- Re-install the baseboards – Done
While the list is concise, the work is extensive.
Remove the Baseboards
The baseboards came off pretty easily by scoring the top edge with a razor blade. This separates the caulk from the drywall and allows for removing the baseboard without pulling the drywall paper with it. I only broke a handful of pieces. A tremendous amount of nails were used though. This will create more work on re-using the boards. We will need to remove the nails, patch the holds, and apply touch-up paint to each one.
Demo the old floor
Carpet removal was easy. Gloves and a razor-blade are the best tools. However, removing the ~400 square feet of tile proved very labor intensive. While clearing the laundry room, the heat, dust, debris, and frustration peaked. I was ready to pay someone to finish the rest of the 280 square feet of tile. However, Amy motivated and encouraged as she often does and together we removed the ceramic tile and thin-set from the kitchen, dining room, and our bathroom. We filled an entire trailer with the trash to take to the landfill. Recommendations:
- Don’t grind unless you have a BIG grinder and lots of vacuum suction. It is too hot, dirty, and inefficient to use a small grinder
- Buy 2 floor scrappers. Amy and I used this one, the blades are quite thin allowing for ‘finish work.’ Replacement blades from Lowe’s are slightly smaller, but super cheap. Change the blade often. We also used another Warner model from Lowe’s with a thicker blade. This was the power scraper while the other was polish. I would not recommend this one, too flimsy.
- This Wet/Dry vacuum was a solid performer
- Good Gloves
- Eye Protection
- Respirator/Mask
- We did 200 square feet in 9 hours or so
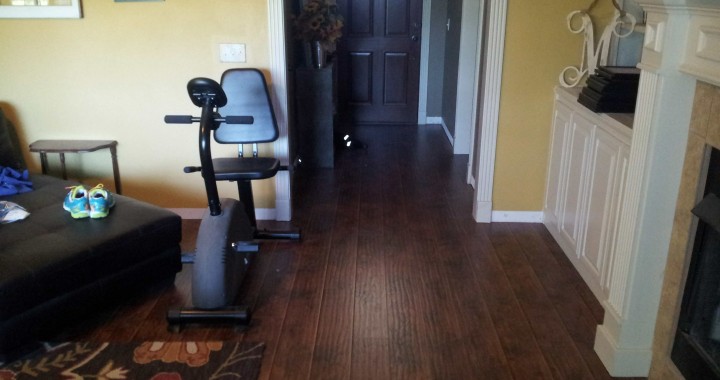
Install the new floor
We purchased our laminate from BestLaminate.com. We chose a wider, hand-scrapped, 12mm plank for a quieter step and modern look. Best Laminate has solid customer service and answered my questions quickly and accurately. The 2 pallets were freighted to the house. The shipping company used a lift and a pallet jack to move them to the garage. 97 boxes total. We also ordered the underlayment, a vapor barrier and cushion product. Everything arrived in great shape.
The install was not too bad but there are some key tools:
- Dead blow hammer
- Hammer Block
- Pull Bar
- Spacers (get more than you think)
- Dry erase markers
- Jig Saw – with lots of extra blades. The HDF (high density fiber board) dulls the blades quickly.
- Laminate Cutter (for the volume of flooring we were doing, this was a must)
- Tape Measure
- Scribe/Compass
- Laminate Flooring Markers
- A saw to cut under door jambs – a must have for the best look
- Laminate Tape
- Knee Pads
- A rip fence jig for your circular saw (inevitably, you will need to cut a plank lengthwise but slightly angled)
Take your time during the tough areas such as doorways parallel to the direction of plank. At the edge of each room to ensure your baseboard will cover the gap between the floor and the wall.
Re-install the baseboards
A pneumatic brad nailer with 18 gauge brads was the tool of choice here. This is not a large nail gun so it can be powered by most compressors. Using a stud finder I was able to put each brad nail directly on a stud. No matter how good you are there will sometimes be a gap between the top of the baseboard and the wall. When this happens some tinted caulk is your best friend. Our ‘Almond’ color caulk from Benjamin Moore was perfect. Don’t get the cheap stuff though, the higher price caulk will have more elasticity and thus not crack as much. We used 2.5 tubes. Finally, we used the same almond color caulk to fill in all the brad nail holes.
We did have to replace some baseboards because I broke them in the demo. Unfortunately Amy and I couldn’t find an exact match at any local store. So, we went to plan B. We removed the baseboards from our garage which were exactly the same as the inside of the house. Then, we replaced the garage baseboards with the closest match we could find. This way, the different baseboard styles are never visible at the same time. While it created extra work on our part, the result was consistent baseboards throughout the house.
I am thrilled this project is finished. I dragged it out for way too long, it consumed a lot of my free time and my thoughts. Having it finished is a weight off my back. Even with the purchase of all the tools (included a compound miter saw), we still saved 50%-60%.
Next project…garage organization, back yard beautification, reclaimed wood door project, window casings, bed frame constructions, new chandelier in the entry way, perhaps changing the dry plug, an additional outlet in the garage (this list just keeps going!)