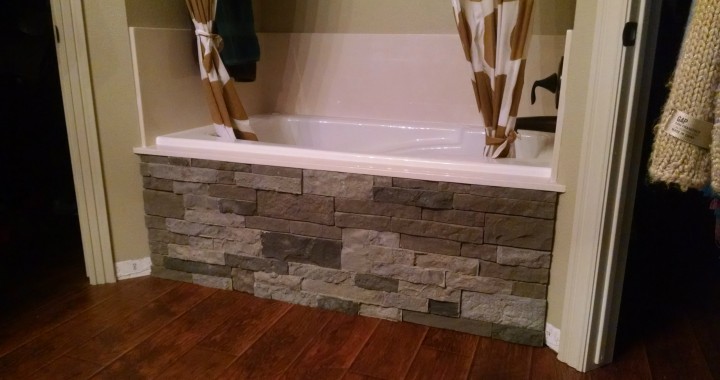
AirStone is manufactured from concrete and coloring to create the appearance of stone. However, it is significantly lighter weight as well as standard size. AirStone, comes in 4 different lengths, 2 different heights, and 4 different types within each color group. We chose a gray color group. This makes it ideal for do-it-yourself folks like Amy and I to install it around the home.
It can be used inside or outside, just ensure you choose an appropriate adhesive. We decided to install it in our bathrooms to surround the tubs and shower. Because this meant it could be exposed to water we used a heavy duty construction adhesive which is water resistant.
The installation is straight-forward. You need a flat, clean surface to install it to. In the photos below you will see we installed concrete backer board around our master bathroom tub.
- Tip: if you don’t need a full sheet of backer board look for a damaged piece. The big box stores will often give you a great deal!
I started from the bottom and worked my way up the surface. At the end of each row I needed a shorter piece of AirStone. To cut the stone you can use a hacksaw.
- Tip: do yourself a favor and get a couple of new hacksaw blades. Also, if your saw supports the longer blades it is worth the extra $1 to buy them
Installation goes quickly if you don’t have to cut. As you’ll see in the photos I had to cut the final row (the top row) lengthwise. This was fairly time consuming, but we are pleased with the result.
In the end the most challenging aspect of this DIY project was actually buying the AirStone. Lowe’s says they carry it, but we had to special order it. Even then, quantities were very limited.